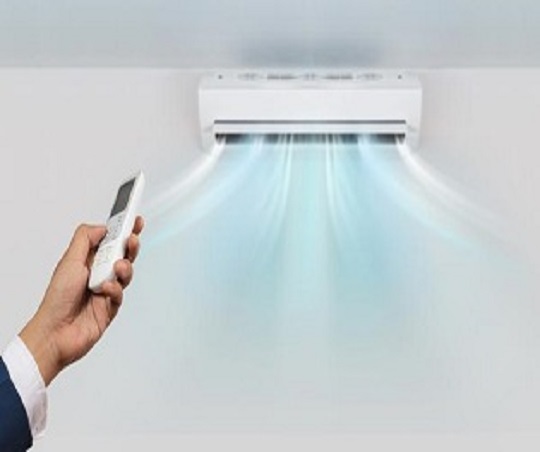
How to Clean Aircon Filters for Optimal Performance
Cleaning your air conditioner filter sounds like a simple chore, yet so many Aussies forget just how vital it is. Even small mistakes during this process can lead to safety hazards, and skipping it altogether means your system could lose up to 30 percent of its cooling capacity. Most people believe a quick rinse is enough, but the way you unplug, handle, and dry the filter can make or break your air quality and even wreck your AC. Get ready to see why ticking the right boxes on your next filter clean is more important than you think.
Table of Contents
- Step 1: Turn Off And Unplug Your Air Conditioner
- Step 2: Remove The Air Filter From The Unit
- Step 3: Clean The Filter With Water And Soap
- Step 4: Let The Filter Dry Completely
- Step 5: Reinsert The Filter And Test Your Air Conditioner
Quick Summary
| Key Point | Explanation |
|---|---|
| 1. Ensure electrical safety first | Turn off and unplug your air conditioner to avoid electrical hazards during cleaning. |
| 2. Handle the filter gently | Carefully remove the air filter by gripping its edges to avoid damage to the mesh material. |
| 3. Use mild soap for cleaning | Clean the filter with lukewarm water and a gentle detergent to maintain its integrity. |
| 4. Dry the filter completely | Allow the filter to dry in a well-ventilated area to prevent mould growth before reinstalling it. |
| 5. Test the unit after reinstallation | Check for proper airflow and temperatures to ensure effective functioning after maintenance. |
Step 1: Turn Off and Unplug Your Air Conditioner
Before diving into the cleaning process, safety must be your top priority. Turning off and unplugging your air conditioner is a critical first step that protects both you and your valuable cooling equipment. This initial stage prevents potential electrical hazards and ensures a safe maintenance environment.
Safety begins with complete electrical isolation. Locate your air conditioning unit’s power source and follow a systematic shutdown procedure. For split system units, start by turning off the system at its control panel or remote. Next, move to your home’s electrical switchboard and switch off the circuit breaker dedicated to the air conditioning unit. This double-layered approach guarantees no residual electrical current remains.
According to NT WorkSafe, completely isolating the electricity supply is crucial to prevent potential electric shock, explosion, or fire risks during maintenance. Unplug the unit from its power socket, ensuring you grip the plug itself rather than yanking the cord. If your unit is hardwired, you might need to consult a professional electrician to safely disconnect the power.
Pay special attention to the physical disconnection process. Gently remove the plug, checking the cord and plug for any signs of wear or damage. While unplugging, keep your hands dry and avoid touching any metal components. If you notice frayed wires or scorch marks, do not proceed with cleaning and contact a professional air conditioning technician immediately.
Verify the unit is completely powered down by attempting to turn it on using both the remote control and manual buttons. No response confirms successful electrical isolation. This careful preparation sets the foundation for a safe and effective air conditioner filter cleaning process, protecting both your equipment and yourself from potential electrical mishaps.
Key Safety Checklist:
- Circuit breaker switched off
- Unit unplugged from power source
- No response when attempting to power on
- Cord and plug inspected for damage
With electrical safety secured, you’re now ready to move forward with accessing and removing the air conditioning filters for thorough cleaning.
Below is an overview table that summarises the main steps for cleaning your air conditioner filter, including estimated time and the core outcome for each phase.
| Step | Description | Estimated Time | Key Outcome |
|---|---|---|---|
| 1 | Turn off and unplug the air conditioner | 5 mins | Ensures electrical safety |
| 2 | Remove the air filter from the unit | 5–10 mins | Prepares filter for cleaning |
| 3 | Clean the filter with water and mild soap | 10–15 mins | Removes dust and grime |
| 4 | Let the filter dry completely | 2–6 hours | Prevents mould growth |
| 5 | Reinsert the filter and test unit | 5–10 mins | Confirms optimal performance |
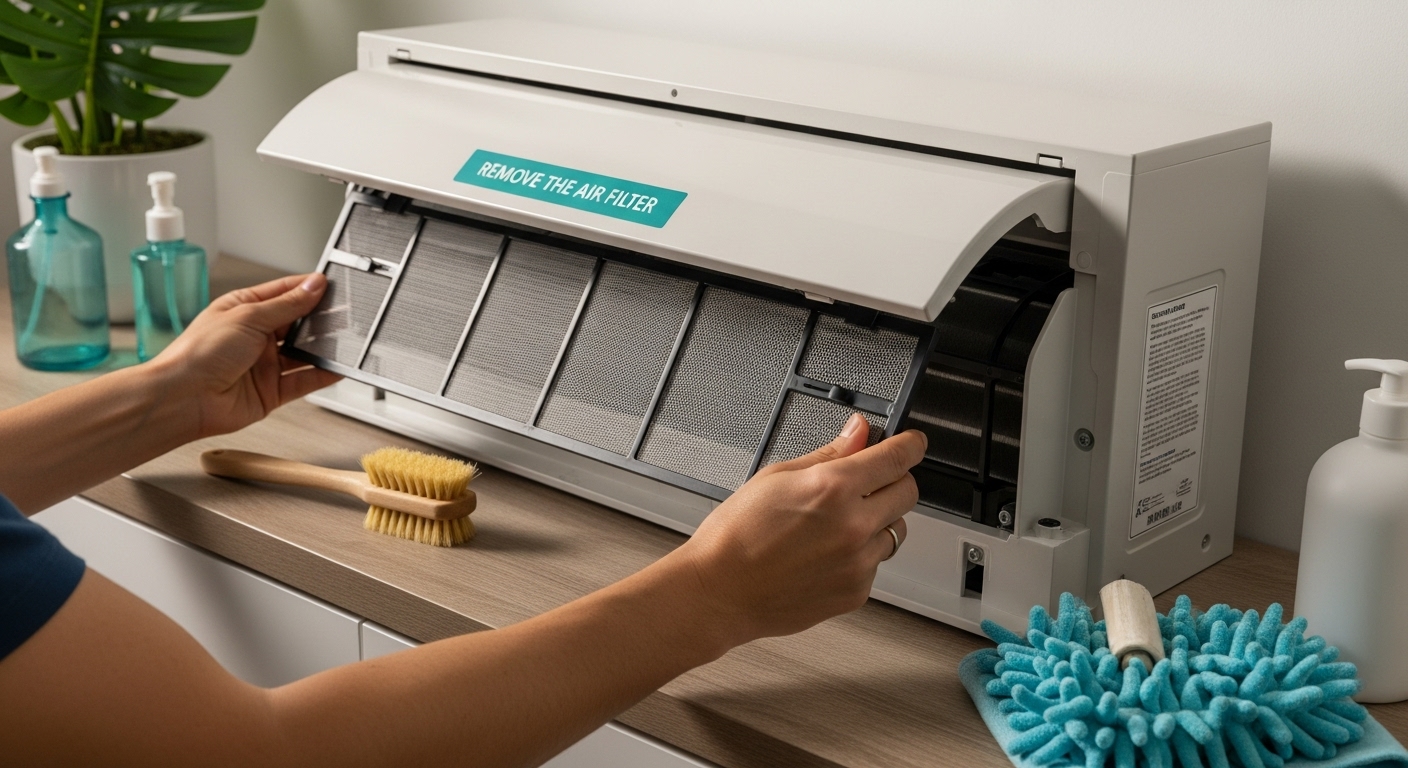
Step 2: Remove the Air Filter from the Unit
Removing the air filter is a delicate process that requires patience and careful attention. This crucial step sets the stage for thorough cleaning and maintenance of your air conditioning system. Different air conditioner models have unique designs, so understanding your specific unit’s configuration is key to successfully extracting the filter without causing damage.
Begin by locating the filter panel on your indoor unit. Most split system and wall mounted air conditioners have a front panel that opens horizontally or vertically. According to NSW Government Housing Guidelines, gently open the front panel by pressing the release clips or sliding mechanisms. These are typically located on the sides or bottom of the unit. Move slowly and deliberately to avoid breaking any plastic clips or hinges.
Once the panel is open, you will see the air filter positioned inside the unit. Carefully grip the filter along its edges, avoiding touching the filter material itself. Most filters are designed to slide out smoothly after being lifted slightly upward or pulled forward. If the filter seems stuck, do not force it. Check for any additional locking mechanisms or clips that might be holding it in place. Some units require you to lift the filter at a specific angle or press a release button to free it completely.
Pay close attention to the filter’s orientation before removal. Take a mental note or even a quick photo with your smartphone to ensure you can replace it correctly later. Some filters have directional arrows or markings indicating the correct installation position. Handling the filter by its frame prevents potential damage to the delicate filtering material and helps maintain its structural integrity.
Critical Filter Removal Checklist:
- Front panel fully opened
- Filter gripped along edges
- Filter removed without force
- Orientation noted for reinstallation
- No visible damage to filter or unit
If you encounter resistance or are unsure about the removal process, consult your air conditioner’s user manual or contact a professional technician. Different brands and models have unique mechanisms, and forcing the filter could result in costly damage to your cooling system. With the filter now carefully removed, you are ready to proceed to the next stage of cleaning and maintenance.
Step 3: Clean the Filter with Water and Soap
Cleaning your air conditioner filter requires a gentle yet thorough approach that removes dust, debris, and accumulated grime without damaging the delicate filter material. This step transforms your filter from a potential performance hindrance to a clean, efficient component of your cooling system.
Prepare a cleaning area outdoors or in a well-ventilated space with a large basin or sink. Select a mild liquid soap or gentle detergent that will effectively break down dirt without degrading the filter’s structure. Avoid harsh chemicals or abrasive cleaners that could compromise the filter’s integrity. According to NSW Department of Family and Community Services, lukewarm water and a soft brush are ideal for removing stubborn dust and particulate matter.
Fill your basin with lukewarm water and add a small amount of mild soap. Submerge the filter carefully, ensuring it is completely covered. Use a soft-bristled brush or your hands to gently agitate the filter, working from one side to the other. Focus on areas with visible dust accumulation, using light circular motions to dislodge trapped particles. Be mindful not to scrub too aggressively, as this could tear or damage the filter’s delicate mesh.
Rinse the filter thoroughly under running water, making sure all soap residue is completely removed. Shake off excess water gently and position the filter in a well-ventilated area away from direct sunlight. Direct sunlight can potentially warp or damage the filter material. If possible, use a clean microfibre cloth to remove initial moisture, helping to speed up the drying process.
Filter Cleaning Verification Checklist:
- Water runs clear during final rinse
- No soap bubbles or residue remain
- Filter appears clean and free of visible dirt
- Filter is positioned to air dry completely
- No tears or damage to filter material
Allowing the filter to dry completely is crucial. Reinstalling a damp filter can promote mould growth and reduce your air conditioning system’s efficiency. Depending on humidity levels, drying might take several hours. Ensure the filter is absolutely dry before returning it to the air conditioning unit. If you are uncertain about the drying time, use a clean, dry cloth to pat the filter or use a low-speed fan to accelerate the process, always avoiding direct heat sources.
The table below lists essential tools and materials required for safe and effective air conditioner filter cleaning, including their purpose as discussed throughout the guide.
| Tool/Material | Specification | Purpose |
|---|---|---|
| Mild liquid soap / gentle detergent | Non-abrasive, suitable for delicate surfaces | Safely removes dirt and grime from the filter |
| Soft-bristled brush or hands | No stiff or wire bristles | Agitates and cleans dust/debris without damaging the filter |
| Microfibre cloth | Lint-free, clean | Blots excess water and assists initial drying |
| Large basin or sink | Clean, size appropriate for filter | Suitable area for washing the filter |
| Portable fan (optional) | Low-speed setting | Speeds up air drying without applying heat |
| Towel or mat | Clean and dry | Surface for laying filter out to air dry |
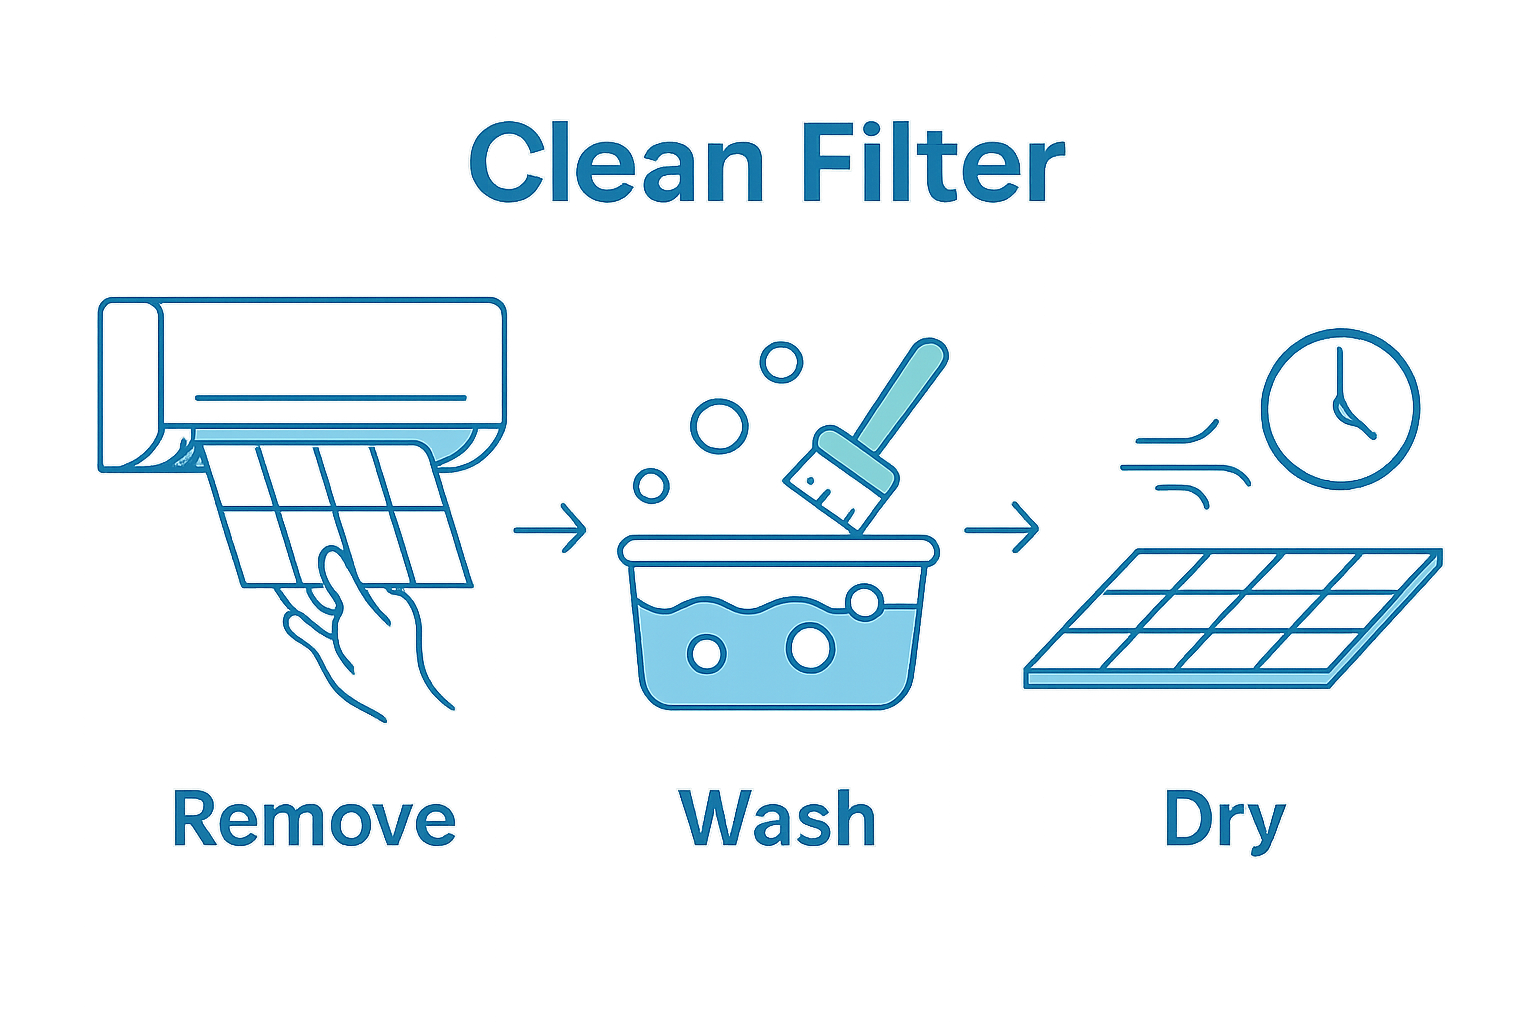
Step 4: Let the Filter Dry Completely
Allowing your air conditioner filter to dry completely is a critical step that prevents potential mould growth, ensures optimal performance, and maintains the long-term health of your cooling system. Rushing this process or reinstalling a damp filter can lead to significant performance issues and potential health risks.
Choose the right drying location carefully. According to Victorian Department of Education Guidelines, filters should be dried away from direct sunlight to prevent material degradation. Select a well-ventilated area with consistent ambient temperature and air circulation. Indoor spaces like a laundry room, covered patio, or a breezy hallway work perfectly. Avoid humid areas like bathrooms or damp basements that could impede the drying process.
Initial moisture removal is crucial for faster drying. Use a clean microfibre cloth to gently pat the filter, absorbing excess water without applying excessive pressure. Be extremely gentle to prevent damaging the filter’s delicate mesh structure. Position the filter horizontally on a clean, dry surface that allows air to circulate underneath. If possible, use a portable fan set on low speed to enhance air circulation, which will significantly reduce drying time without risking filter damage.
Drying time varies depending on humidity levels and air circulation. In typical Australian conditions, expect the filter to take between 2 to 6 hours to dry completely. During this period, periodically check the filter’s moisture level by touching it lightly. The filter should feel completely dry to the touch, with no dampness detected. Patience is key – reinstalling a filter with even slight moisture can create an environment conducive to mould and bacterial growth.
Filter Drying Verification Checklist:
- Filter placed in well-ventilated area
- Away from direct sunlight
- No visible moisture on surface
- Feels completely dry to touch
- No musty or damp odour present
Before reinstalling, perform a final visual and tactile inspection. The filter should look clean, feel completely dry, and show no signs of damage or excessive wear. If you detect any unusual odours, discoloration, or structural issues, consider replacing the filter entirely. Proper drying is not just about preparation for reinstallation, but a critical maintenance step that ensures your air conditioning system continues to operate efficiently and maintains excellent air quality.
Step 5: Reinsert the Filter and Test Your Air Conditioner
Reinserting the clean filter and testing your air conditioner marks the final stage of your maintenance process. This critical step ensures that all your careful cleaning efforts translate into improved air quality and system performance. Precision and attention to detail will guarantee your air conditioning unit operates at its optimal level.
Begin by carefully aligning the filter with its original mounting frame. Pay close attention to the filter’s orientation, checking for any directional arrows or markings that indicate the correct installation position. According to NSW Department of Family and Community Services, ensure the ‘FRONT’ mark faces towards you when reinserting the filter. Slide the filter smoothly into its designated slot, applying gentle, even pressure to ensure it sits flush within the unit’s frame.
Once the filter is securely in place, close the front panel by gently pushing at both sides and the middle. Listen for a subtle click that confirms the panel is properly sealed. This prevents dust and debris from bypassing the clean filter and ensures maximum filtration efficiency. Take a moment to visually inspect the panel, confirming there are no gaps or misalignments that could compromise the unit’s performance.
Now comes the exciting moment of testing. Restore power to the air conditioning unit by switching on the circuit breaker and plugging the unit back in. Turn on the system and observe its initial operation carefully. Run the unit for at least 10-15 minutes, paying attention to several key performance indicators. Listen for any unusual sounds that might suggest improper filter installation. Check the airflow strength and observe whether the cooling or heating performance feels consistent and smooth.
Air Conditioner Performance Verification Checklist:
- Filter seated correctly in frame
- Front panel closed securely
- No unusual mechanical sounds
- Consistent airflow strength
- Normal temperature regulation
- No strange odours during operation
If you notice any irregularities during testing, such as reduced airflow, strange noises, or inconsistent temperature control, stop the unit and double-check the filter installation. Sometimes a slight misalignment can impact overall system performance. Remember that regular maintenance like this not only improves your air conditioner’s efficiency but can also extend its operational lifespan, saving you money on potential repairs and replacements in the long run.
Breathe Easy with Professional Air Conditioner Filter Care
If cleaning your aircon filters feels overwhelming or you are unsure about the right methods for your specific system, you are not alone. Many Sunshine Coast homeowners worry about damaging their units or missing hidden dirt that can hurt performance and indoor air quality. This article has given you the essential steps for safe and effective filter cleaning, but sometimes regular DIY maintenance just is not enough—especially if you notice persistent dust, weak airflow, or musty smells after cleaning.

For peace of mind and air conditioning that keeps your home comfortable all year round, trust the experts at Sunshine Coast Air Conditioning. Book a professional service and let our certified team inspect, deep-clean, and maintain your system for optimal efficiency and healthier air. Visit our home page to request your maintenance appointment now. Take control of your air quality and avoid bigger problems down the track.
Frequently Asked Questions
How often should I clean my air conditioner filters?
It is recommended to clean your air conditioner filters every 1 to 3 months, depending on usage and environmental conditions. Regular cleaning ensures optimal air quality and system performance.
What cleaning solution is best for air conditioner filters?
Use a mild liquid soap or gentle detergent mixed with lukewarm water to clean air conditioner filters. Avoid harsh chemicals or abrasive cleaners that could damage the filter material.
Can I clean my air conditioner filter with a vacuum?
While a vacuum can help remove loose dust and debris from the filter, it is best to wash it with water and soap for a thorough clean, especially if there is stubborn grime.
What are the signs that my air conditioner filter needs cleaning?
If you notice decreased airflow, unusual sounds, or an increase in energy bills, it may indicate that your air conditioner filter is clogged and needs cleaning.